Following are the instructions for setting up your site to resemble the Outreach Pro theme demo.
You may wish to have the Outreach Pro theme demo open for reference while setting up your theme. The setup documentation for this theme has been broken down into the following sections:
- Pre-Installation Setup
- How to Configure the Genesis Theme Settings
- How to Configure the Site Title Header Text
- How to Use a Custom Header Image
- How to Use a Background Image or Color
- How to Configure the Navigation Menus
- Header Right Widget Area
- How to Configure the Home Page
- How to Configure the Home – Top
- How to Configure the Home – Bottom Widget area
- How to Configure the Primary Sidebar Area
- How to Configure the Footer Widget Areas
- How to Create a Blog Page
- Special Widget areas Included in the Outreach Pro Theme
Pre-Installation Setup
Compatibility
Make sure you have the following installed:
- WordPress version 3.6+
- Genesis Framework version 2.0+
Plugins
Before you begin, you will need to install and activate the following plugins Of course, you may substitute your favorite plugin, but this is the one used in the Outreach Pro theme demo:
How to Configure the Genesis Theme Settings
In your WordPress admin, navigate to Genesis > Theme Settings. Configure the Theme Settings as follows:
Color Style
- Click on the Color Style Dropdown to select an alternative color scheme for your site.

Default Layout
- Click a thumbnail to select the Default Layout. The Outreach Pro theme uses the Content > Sidebar option.

Breadcrumbs
The Outreach Pro theme demo is configured to display Breadcrumbs on Posts, Pages, Archives, and 404 Pages.

Content Archives
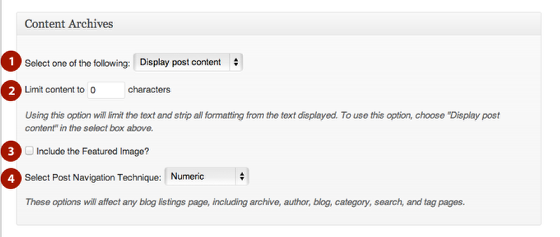
- For Content Archives, the default setting of “Display post content” is used by the demo.
- Leave the “Limit content to __ characters” option blank or set to 0.
- Leave “Include the Featured Image?” checkbox unchecked.
- Using the drop down box, select “Numeric” for the “Post Navigation Technique.”
Be sure to click the “Save Settings” button to preserve your changes.
How to Configure the Site Title Header Text
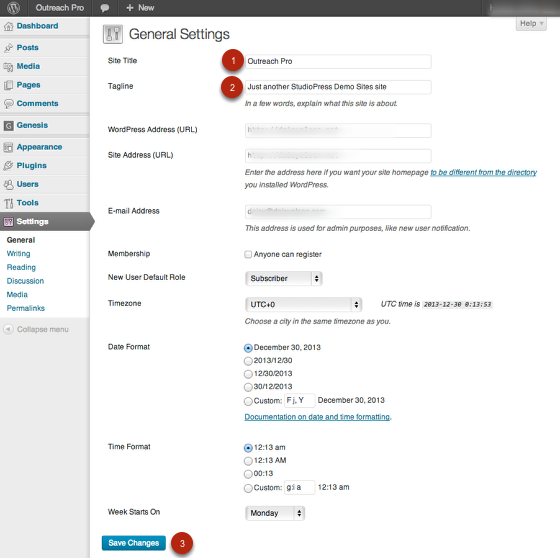
The site title and description for your site can be set by navigating to Settings > General.
- The Site Title will display in the upper left corner of your site.
- The Tagline Setting will not not displayed when using the Outreach Pro Theme.
- Be sure to click the “Save Settings” button to preserve your changes.
How to Use a Custom Header Image
If you prefer a Logo Image rather than a text based Site Title it is possible to use a small logo style image that will display in the upper left corner of the site.
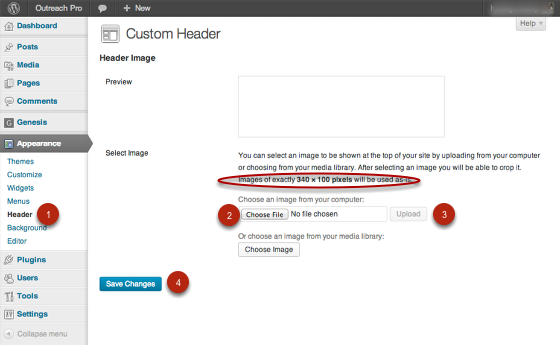
- Navigate to Appearance > Header menu in your WordPress admin panel
- Click “Browse” and Navigate to the image you would like to use for a Logo. Images of exactly 340 × 100 pixels will give the best results. Other sizes will be cropped in the upload process to create an image of the correct size.
- Click “Upload” to copy the image from your computer to your website.
- Be sure to click the “Save Settings” button to preserve your changes.
How to Use a Background Image or Color
The Outreach Pro theme demo can be configured to display an image behind the content area of the site.
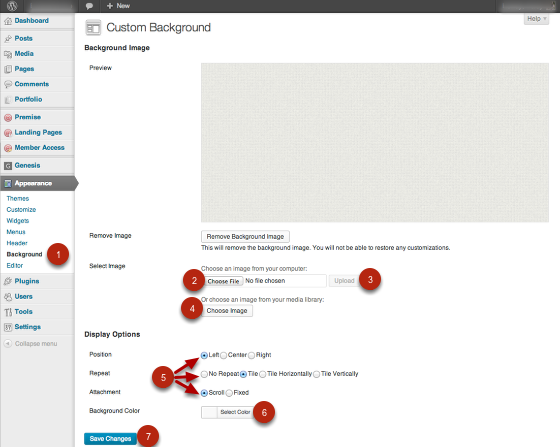
- Navigate to Appearance > Background in your WordPress admin panel.
- Use the “Browse” button to select the background image you wish to use from your computer.
- Once the image has been selected click the “Upload” button to load the image for use on your site.
- Alternatively you can use the “Choose Image” button to select the background image you have loaded to your site previously.
- The Display Options settings for Position, Repeat, and Attachment can be set depending on the optimal settings for the image you have chosen.
- To select a Background Color to show around, or instead of a background image in click “Select Color” and choose a color or enter a hexadecimal color code.
- Click the “Save Changes” button to preserve your changes.
How to Configure the Navigation Menus
In the Outreach Pro theme, the Primary is used in the demo.
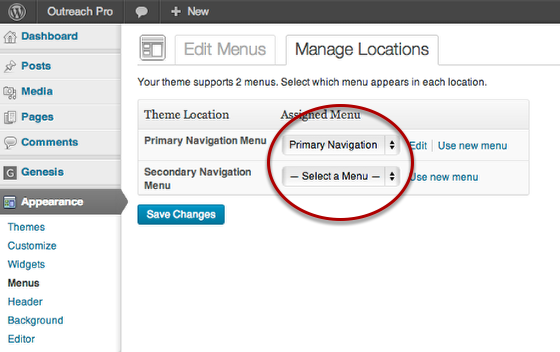
The default navigation areas can be set by navigating to Appearance > Menus > Manage Locations. Set the Primary navigation to the previously created menu of your choice in the drop down to set the default Primary Navigation Menu location.
A Menu set in the Primary or Secondary Navigation Menu location will display just below the header area of your site.
Be sure to click the “Save Settings” button to preserve your changes.
Header Right Widget Area
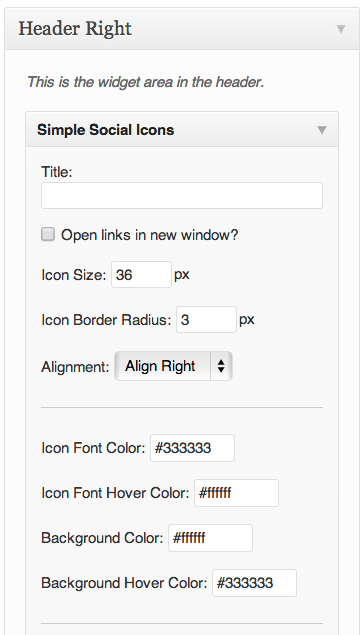
A Simple Social Icons widget is used in the demo of the Outreach Pro theme in the header right widget area.
- Title: blank
- Icon Size: 36px
- Icon Border Radius: 3px
- Alignment: Align Right
- Icon Font Color: #333333
- Icon Font Hover Color: #ffffff
- Background Color: #ffffff
- Background Hover Color: #333333
Be sure to click the “Save” button to preserve your changes.
How to Configure the Home Page
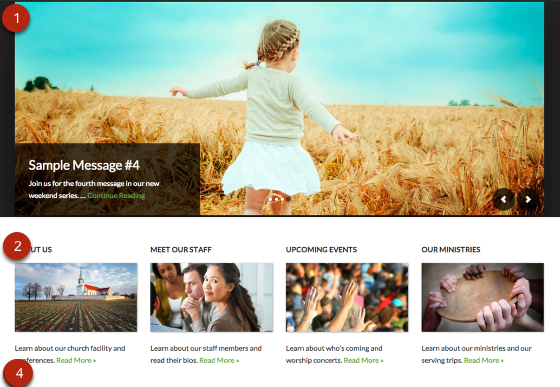
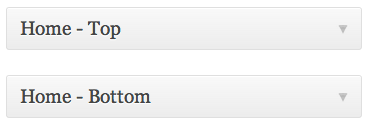
The Outreach Pro theme demo home page is configured via two widget areas.
- Home – Top: A full width widget area configured using the Genesis Responsive Slider widget
- Home – Bottom: A full width widget area configured to display 4 widgets horizontally across the home page.
Note: If no Widget areas are active in any of the Home Page Specific Widget Areas a Blog Style Home page will be displayed. If you wish to use a Static Page for your home page do not add widgets to the Home Page widget areas since this will override the Home Page setting.
How to Configure the Home – Top
To activate the Slider feature of the Outreach Pro Theme Home page add the Genesis – Responsive Slider widget to the Home – Top widget area.
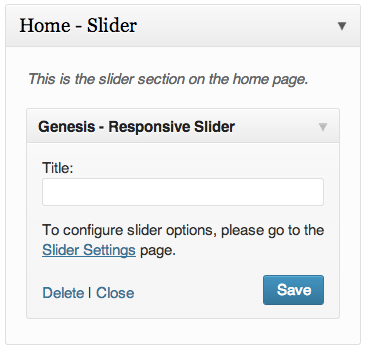
How to Configure the Genesis Responsive Slider Settings
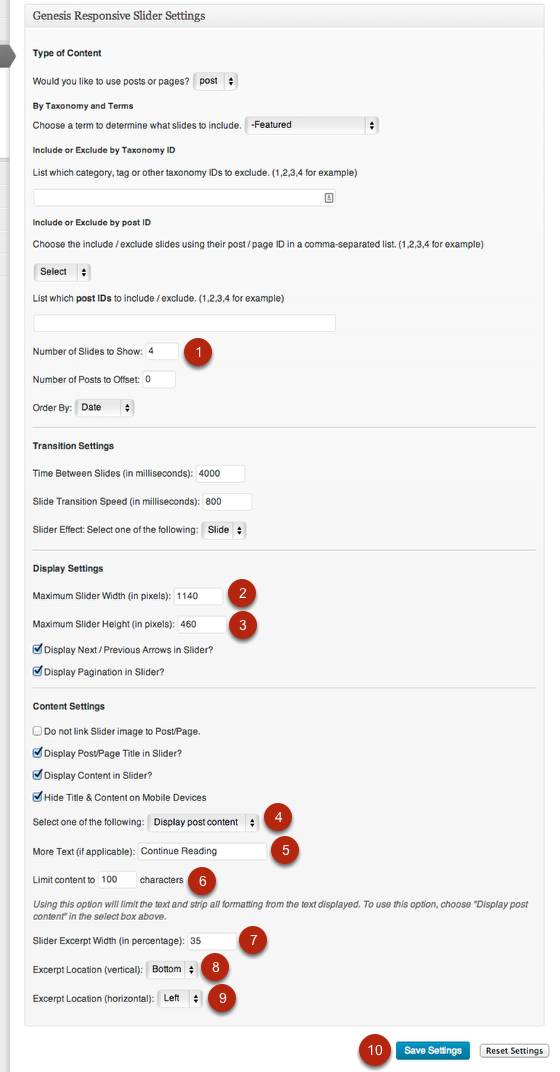
The Outreach Pro theme includes all of the settings necessary in order to display the Genesis Responsive Slider widget as it is displayed in the Outreach Pro theme demo. If the settings do not match the settings below navigate to Genesis > Slider Settings in your WordPress admin panel and click the Reset Settings button.
- Number of Slides to Show: 4
- Maximum Slider Width (in pixels): 1140
- Maximum Slider Height (in pixels): 460
- Display Post Content
- More Text: Continue Reading
- Limit Content to 100 Characters
- Slider Excerpt Width (in percentage): 35
- Excerpt Location (vertical): Bottom
- Excerpt Location (horizontal): Left
- Be sure to click the “Save” button to preserve your changes.
Note: You may wish to Install and Run the Regenerate Thumbnails plugin in order for the featured images to be available in the appropriate size for the slider and other sections of the home page.
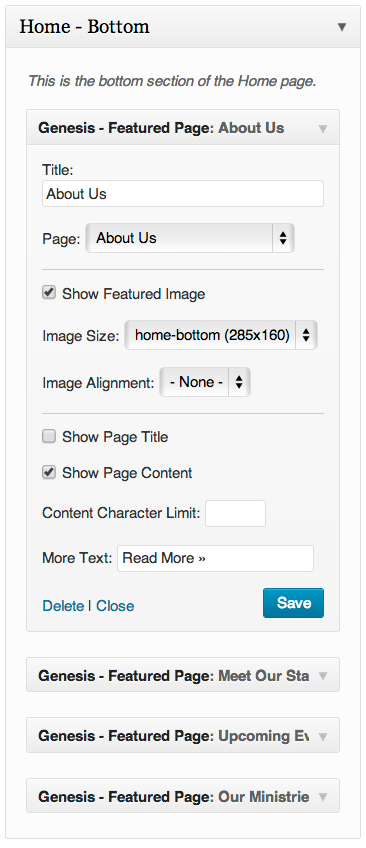
How to Configure the Home – Bottom Widget area
The Home – Bottom widget area will display 4 widgets horizontally across the Home Page just below the Slider. The Outreach Pro theme demo is configured to display featured pages in this area. A more tag is placed in the page content to limit the amount of text displayed on the home page.
How to Configure the Primary Sidebar Area
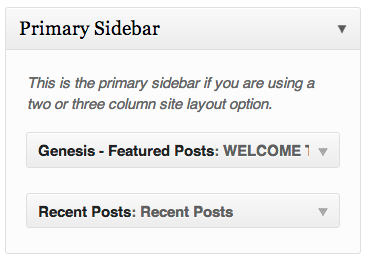
The following widgets are used in the Primary Sidebar area that displays to the right side of the content area.
- Genesis – Featured Posts Widget
- Recent Posts Widget
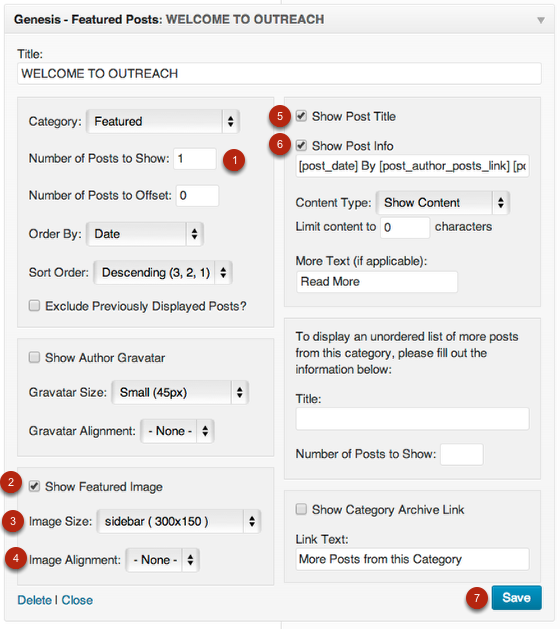
Genesis – Featured Posts Widget Settings:
The following are the settings that differ from the default settings for this widget:
- Number of Posts to Show: 1
- Show Featured Image: Yes
- Image Size: sidebar( 300×150 )
- Images Alignment: None
- Show Post Title: Yes
- Show Post Info: Yes
- Be sure to click the “Save” button to preserve your changes.
Note: A more tag is placed in the page content to limit the amount of text displayed on the home page.
Be sure to click the “Save” button to preserve your changes.
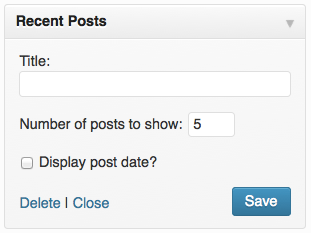
Recent Posts Widget Settings:
- Number of posts to show: 5
Be sure to click the “Save” button to preserve your changes.
How to Configure the Footer Widget Areas
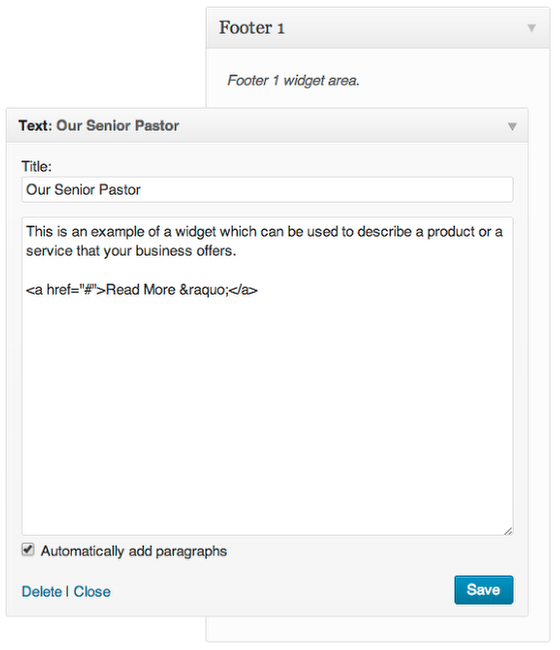
The Outreach Pro theme demo uses the included 4 Footer Widget areas. The following outlines the widgets used in the Outreach Pro theme demo. You may use any widgets you like in these areas.
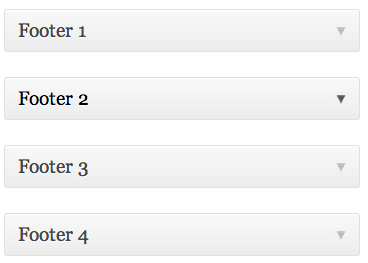
Footer 1 Widget Area:
- Text Widget
Be sure to click the “Save” button to preserve your changes.
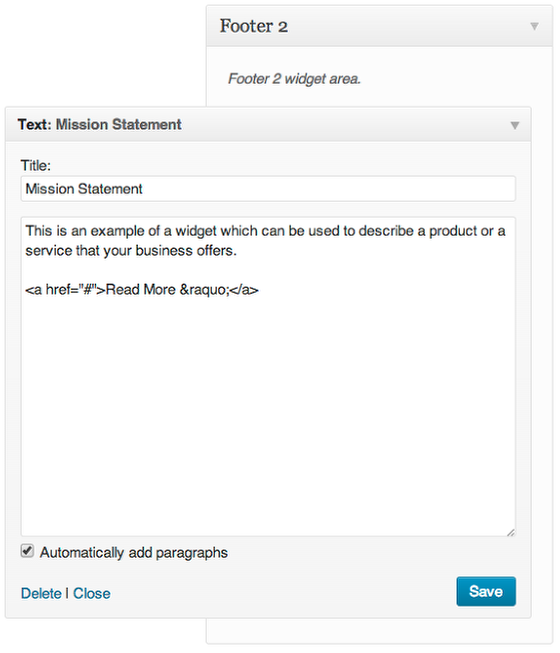
Footer 2 Widget Area Settings:
- Text Widget
Be sure to click the “Save” button to preserve your changes.
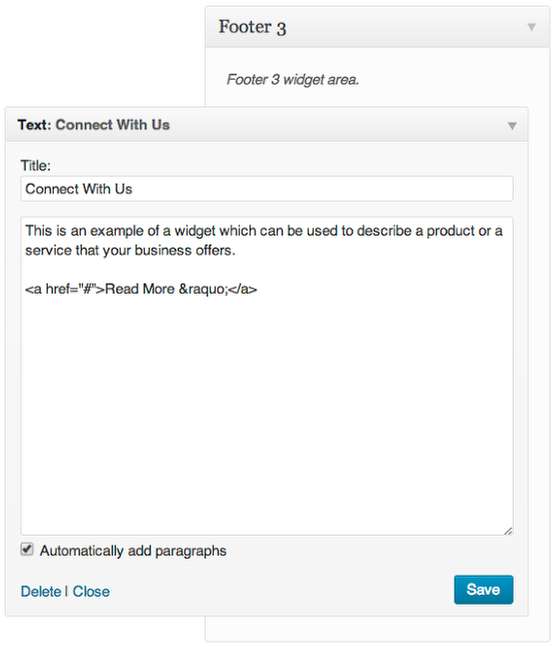
Footer 3 Widget Area Settings:
- Search Widget
- Tag Cloud Widget
Be sure to click the “Save” button to preserve your changes.
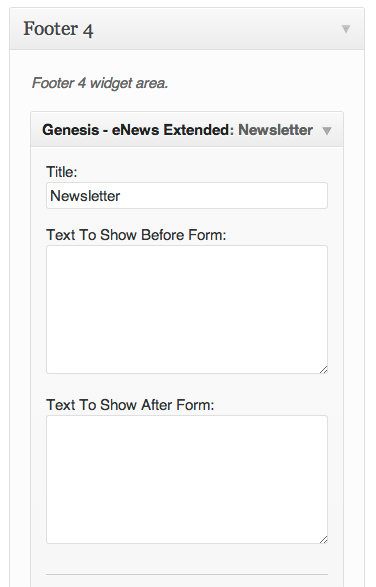
Footer 4 Widget Area Settings:
Be sure to click the “Save” button to preserve your changes.
How to Create a Blog Page
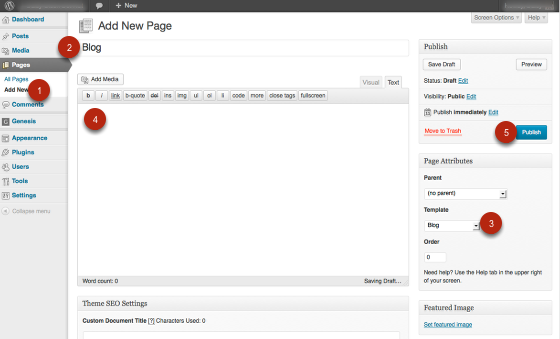
When using a widgetized home page it can be helpful to create a general blog style page to display elsewhere on your site. For instructions on how to create this page follow the following steps:
- Navigate to Pages > Add New in your WordPress Admin Panel
- Create a New Page named “Blog”
- In the right sidebar of the Page edit screen select the Blog option in the template dropdown menu.
- Leave the Content of this page blank, it will not be displayed when using the Blog page template.
- Publish the page.
Once the page has been published you can view the page to see a blog style list of recent posts. Link to this page in the custom menu of your choice.
Special Widget areas Included in the Outreach Pro Theme
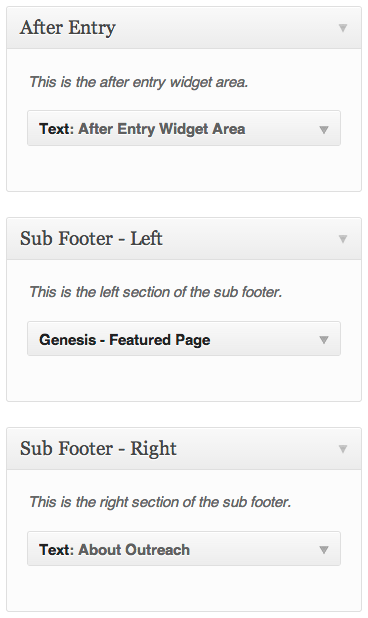
The Outreach Pro theme includes two special widget area designed to display additional content on your site:
- After Entry Widget Area – Displays after the content on single posts
- Sub Footer – Left – Displays above Footer Widget in the left three-quarters of the content area
- Sub Footer – Right – Displays above Footer Widget in the right one-quarter of the content area
